How to Update an Overnight Location in Athlete Connect
how to update an overnight location in Athlete Connect
This guide provides step-by-step instructions on how to update your overnight location for a vacation, competition, or any other event. It includes detailed instructions and screenshots to help you navigate the process easily. By following this guide, you can ensure that your Whereabouts are up-to-date and accurate.
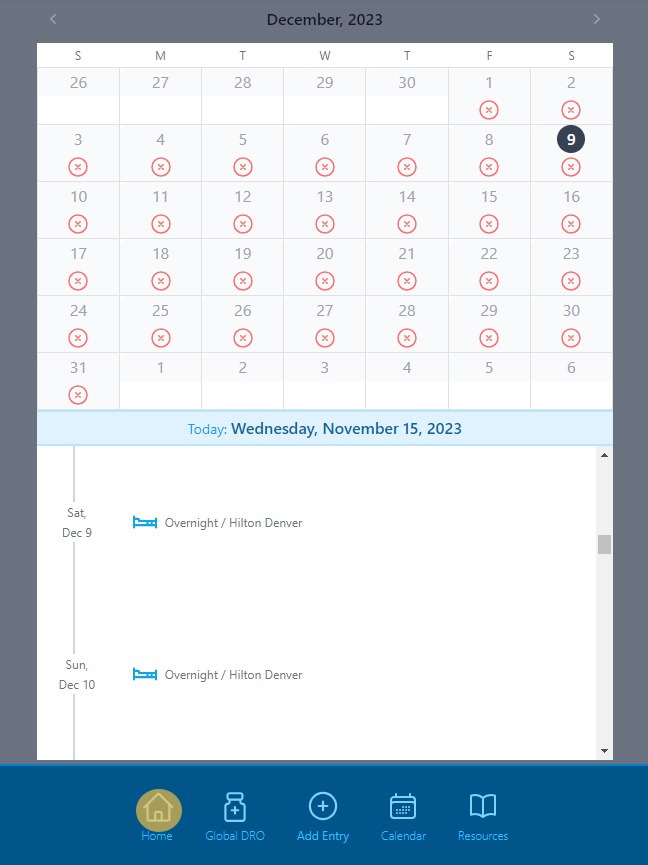
1. Open Athlete Connect on your mobile device, computer, or tablet.
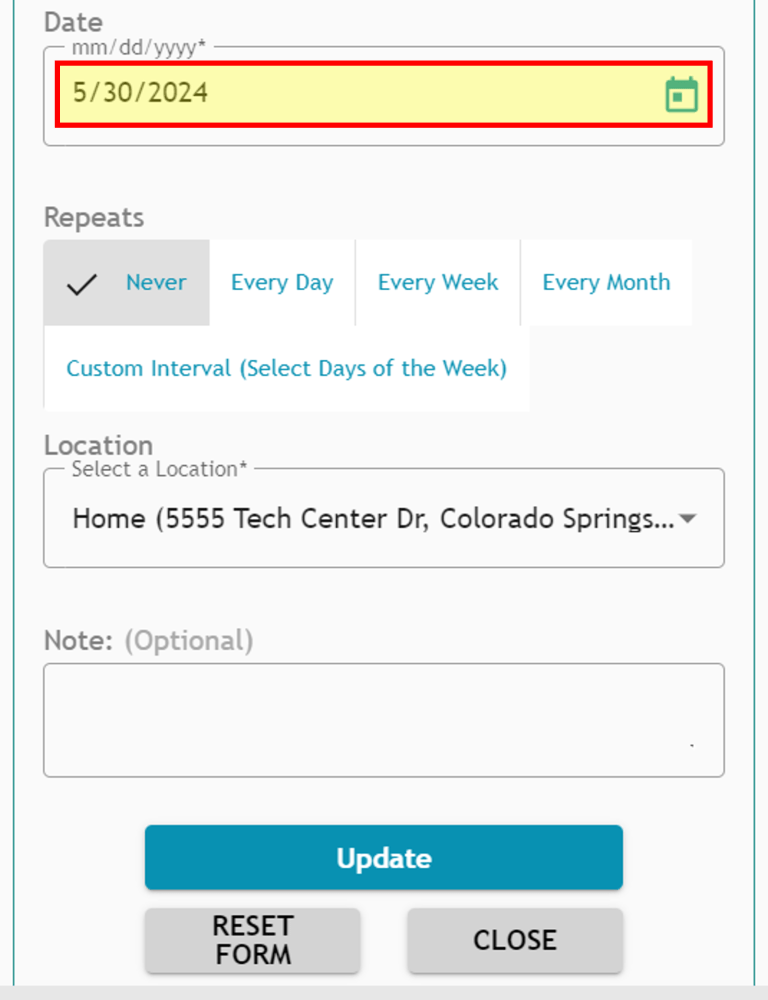
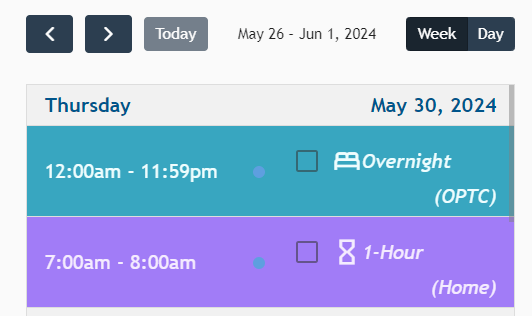
2. On the calendar, select the overnight entry you would like to update. In this example, we will only update the entry on May 30, 2024, which is nicknamed “Home.” To update multiple overnight entries in a row, such as May 30 to June 3, see step 10.
3. Verify that the date selected is the date you want to update.
4. Verify the “Repeats” selection is “Never.” This will only update the selected date, May 30, 2024.
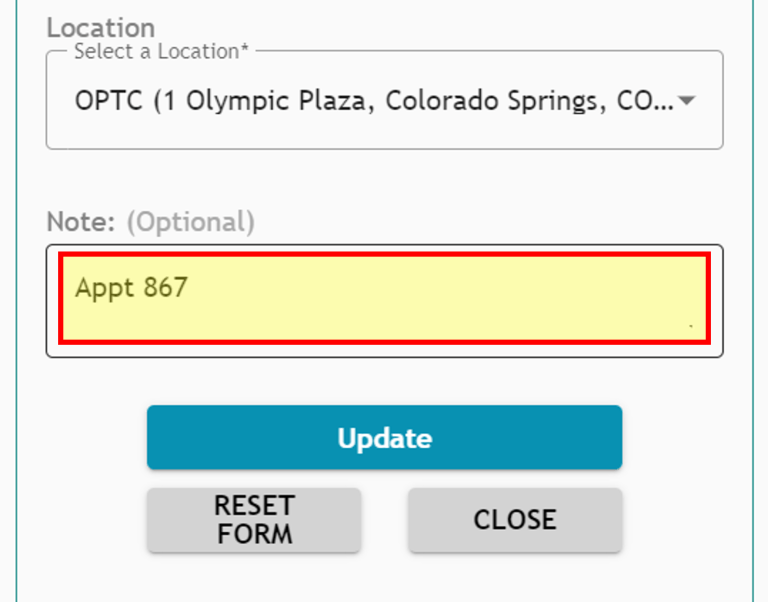
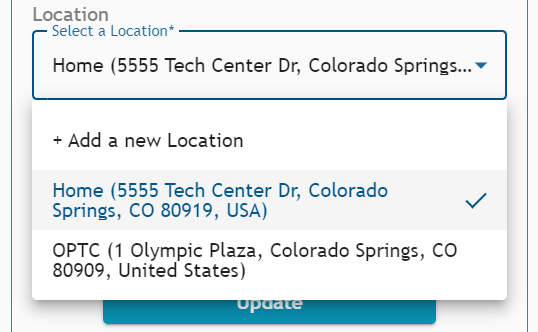
5. To update the location, select the “Location” drop down and either add a new location or choose an existing location. In this example, we will change the location to the address with the nickname “OPTC.”
6. To update “Notes” with information that is required to ensure we can locate you, change the information in the “Notes” field by clicking in the box. In this example, we will add the apartment number.
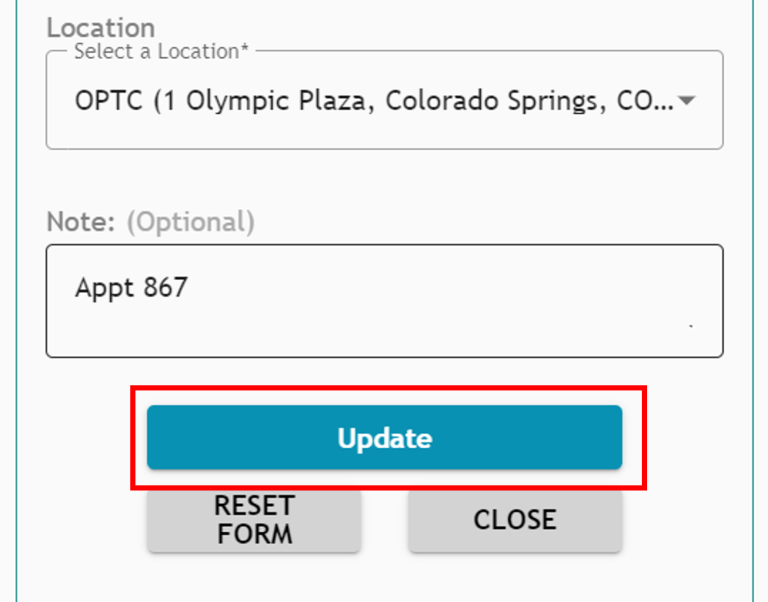
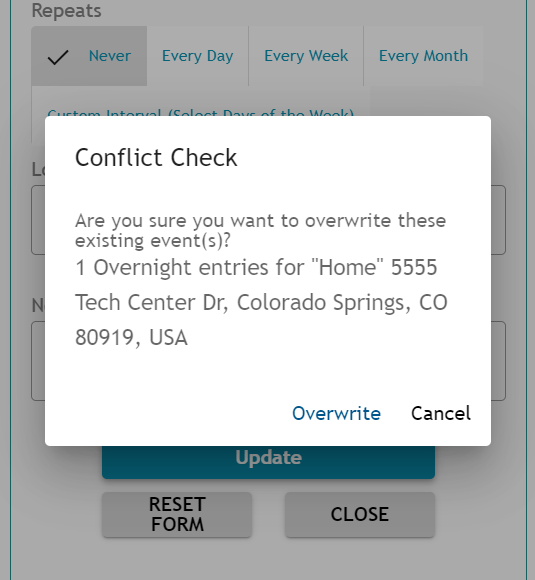
7. After verifying all fields are correct for this date, select “Update.”
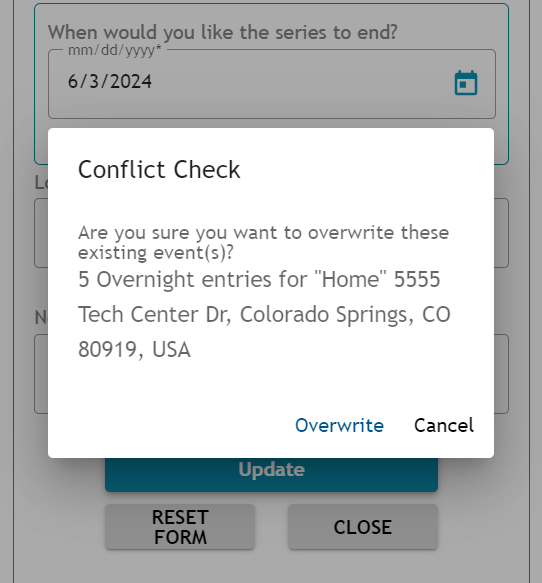
8. A “Conflict Check” pop-up message will appear. This window is verifying we want to update the overnight entry with the information we verified above. Select “Overwrite” to confirm.
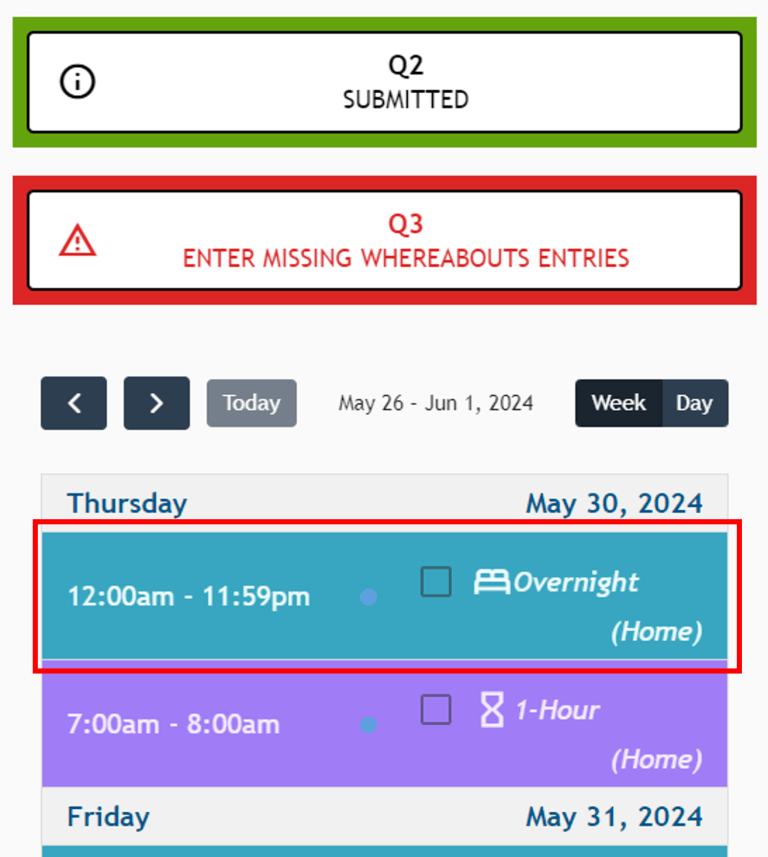
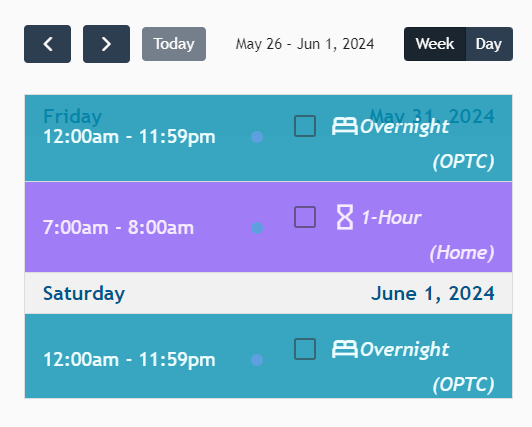
9. In the calendar, the overnight is updated. Since we updated the location, the location nickname now reads “OPTC.” You can also select the overnight entry to verify the other data fields.
10. To update multiple overnight entries in a row, such as May 30 to June 3, select the first overnight entry you want to change.
11. Verify that the selected date is the first date in the range you want to change.
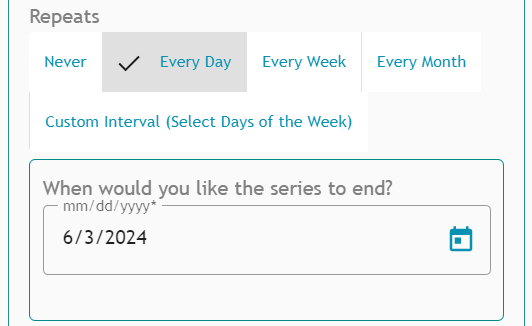
12. For the “Repeats” selection, select “Every Day.” This will allow you to change multiple overnight entries in a row. Set the end date to be the last date in the range you want to change. In this example, we will update overnight entries from May 30 to June 3, so the start date wouth be May 30 and the end date would June 3.
13. To update the location, select the “Location” drop down and either add a new location or choose an existing location. In this example, we will change the location to the address with the nickname “OPTC.”
14. To update the “Notes” with information required to effectively locate you, change the information in the “Notes” field by clicking in the box. In this example, we will add the apartment number.
15. After verifying all fields are correct, select “Update.”
16. A “Conflict Check” pop-up message will appear. This window is veryfing that you want to change the overnight entries with the information verified above. Select “Overwrite” to confirm.
17. In the calendar, the overnights are updated. Since we updated the location, the location nickname now reads “OPTC” for overnight entries from May 30 to June 3. You can also select an overnight entry to verify the other data fields.
18. Once your overnight has been added to your calendar, click the “Calendar” icon to review your entry.
19. Navigate to the appropriate day or days on the calendar to view your overnight. Click the “Home” icon to return to your dashboard.


 Search Medications & Ingredients