This guide provides step-by-step instructions on how to file your overnight Whereabouts entry on the Athlete Connect web application. It includes detailed instructions and screenshots to help athletes easily navigate through the process. Following this guide will ensure that athletes accurately file their overnight Whereabouts and provide important information for locating them for testing.
1. Open Athlete Connect on your mobile device, computer, or tablet.
2. Click “Enter Missing Whereabouts Entries” header for the quarter you would like to file.
3. Read the Filing Wizard welcome message and click the “Continue” button.
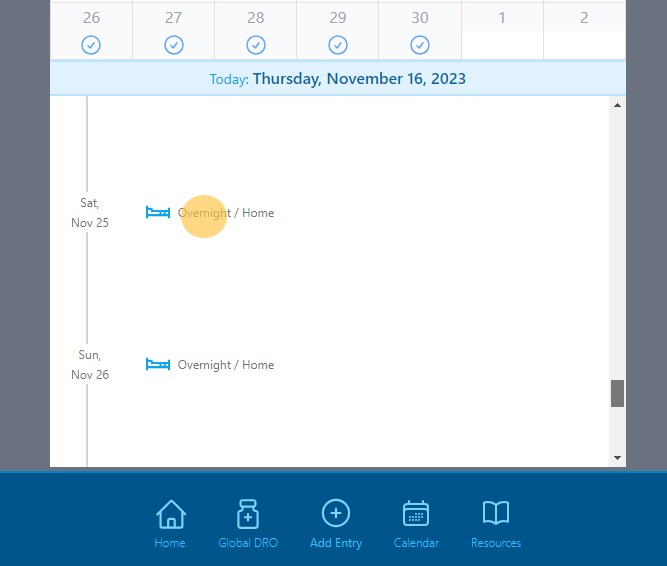
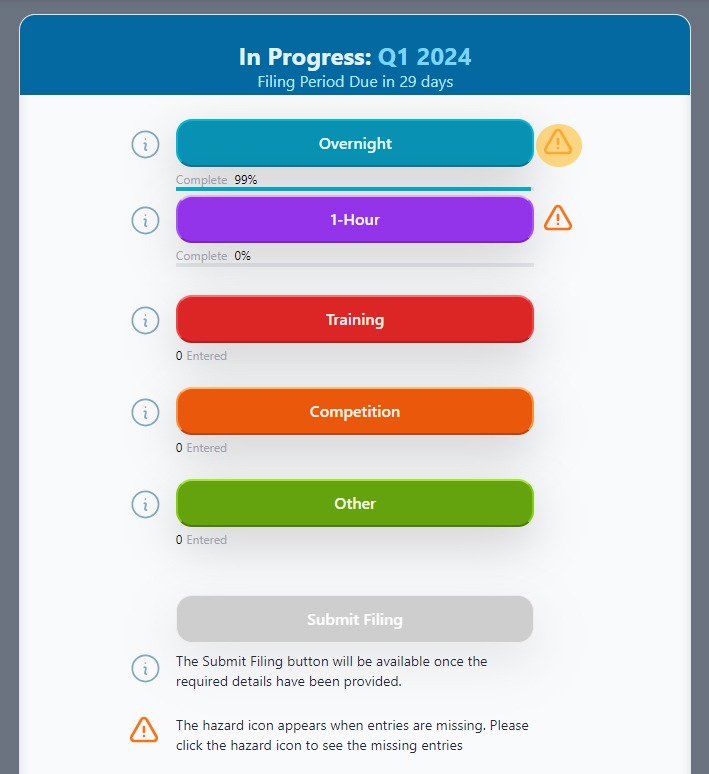
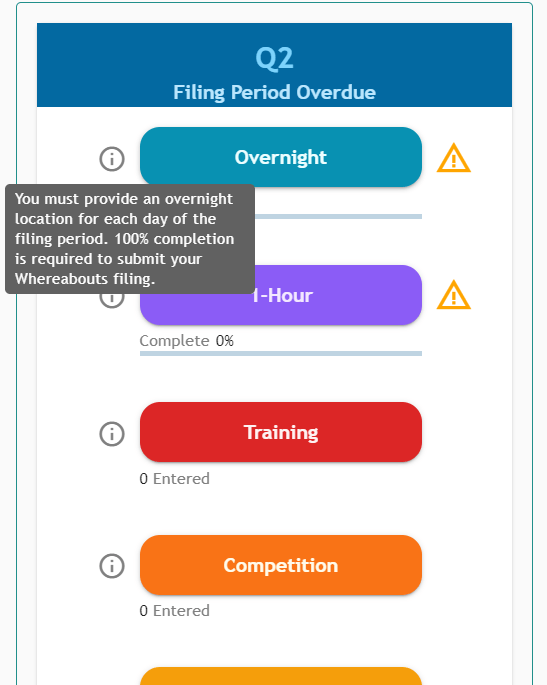
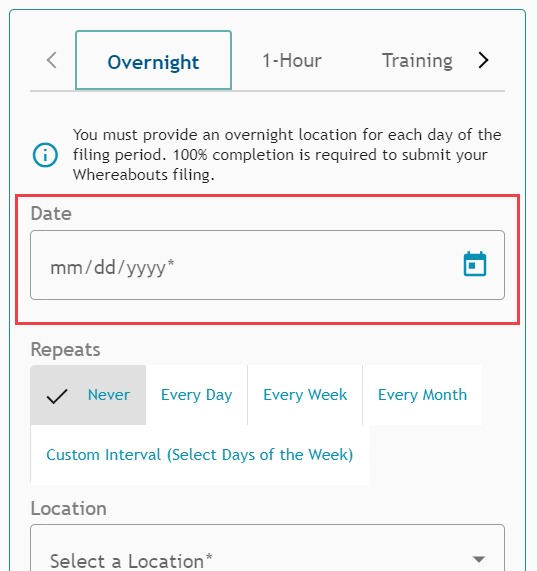
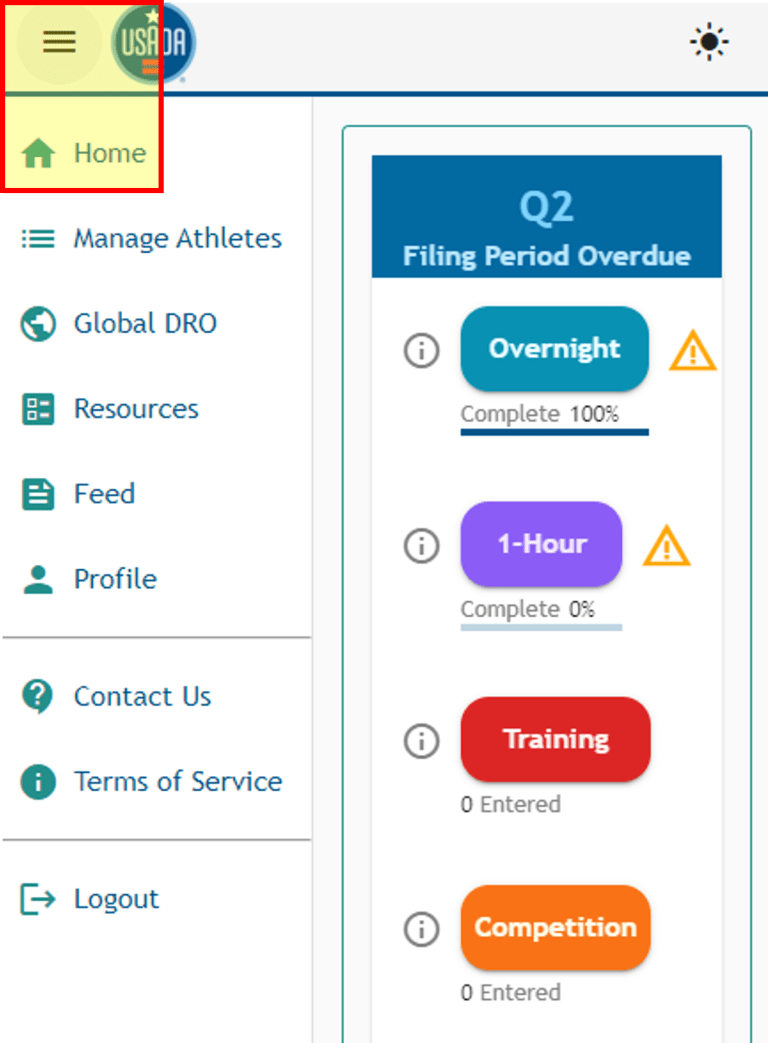
4. Use the “i” modal to the left of “Overnight” to learn about your overnight requirements
5. To begin entering your overnight locations, click the “Overnight” button. Take note of the percentage complete bar below the button. This indicates what percent of overnights you have entered for the quarter. Your entries must be 100 percent complete before submitting your filing.
6. Once in the “Overnight” tab, begin by entering the start date for your overnight entry in the date field. You can click the calendar icon on the right side of the screen or manually enter the start date by clicking “mm/dd/yyyy.”
7. Next, select the “Repeats” options that best fits your entry. Note that the “Repeats” option always defaults to “Never.”
8. Click the appropriate option to establish your repeats setting for your overnight entry. “Every Day” will allow you to select a date range you wish to apply to your overnight entry.
9. Use the “mm/dd/yyyy” fields or the calendar icon to enter when you want the overnight entry to end.
10. Next, set your overnight location by clicking the “Select A Location” dropdown. You will be able to choose from a previously added location or given the option to add a new location.
11. If adding a new location, enter a “Label” for your overnight location. Make sure to enter a label that will allow you to easily identify the location. For instance, CO Springs OPTC Dorms. Your entry will be saved to your address book for later use.
12. Begin entering the address for your overnight location in the address bar. Google location services will begin to populate the address once you have entered enough information. Click on the appropriate address for your overnight location. Make sure you have selected the right address before proceeding to the next step.
13. Once the address has been selected, select the “Save” button.
14. Click the “Note: (Optional)” field to provide further information about how to locate you for testing at this location (e.g., gate information, apartment numbers, etc.)
15. Once you have confirmed the details of your overnight entry, click the “Add” button.
16. To confirm that your entry was added, start by selecting the three-line icon located in the top left corner of the application and then select “Home” to navigate to the calendar view.
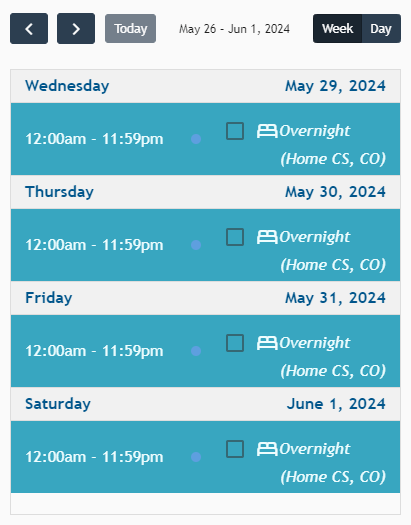
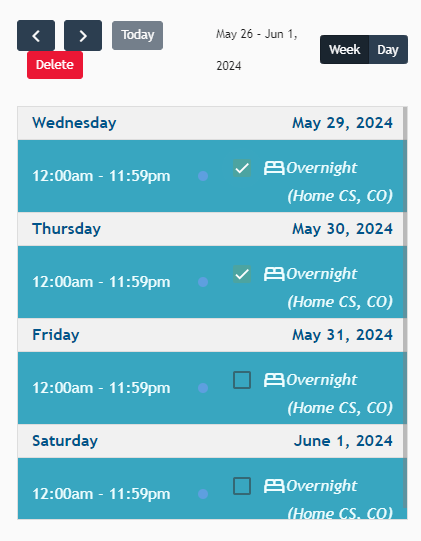
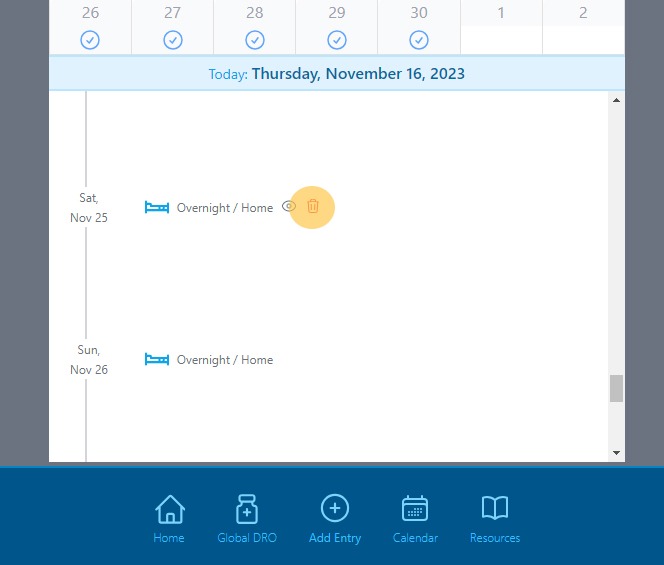
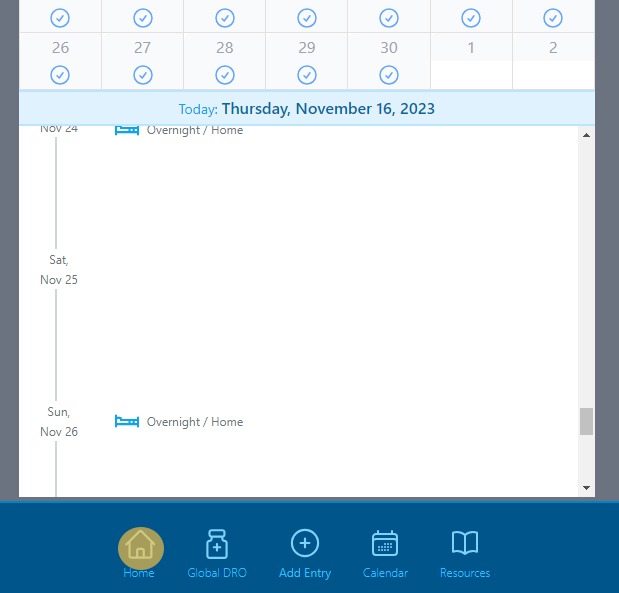
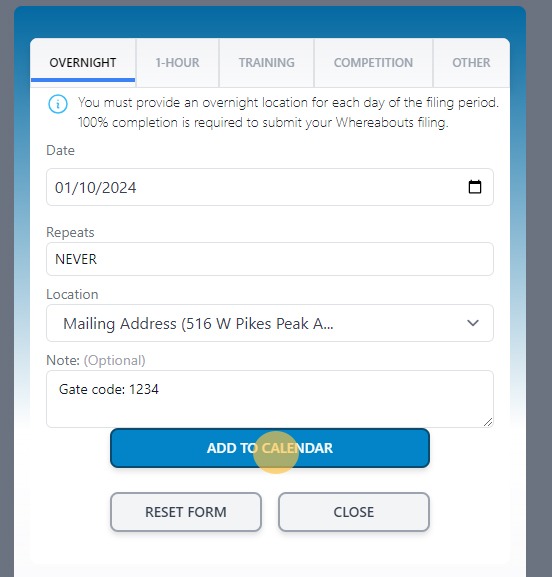
17. Select the appropriate date range and doublecheck your overnight entry is listed. Confirm that your overnight entry is accurate by tapping on the appropriate days in the calendar. Your overnight entry can be identified by the bed icon located in the entry details section below the calendar.
18. If you wish to delete an overnight entry, check the box next to entries to delete and then select the red “Delete” button that appears above.
19. You will receive a pop-up asking you to confirm the deletion of your entry. Click the “Delete” button to remove the selected entries from your calendar.
20. Reference the completion percentage below the “Overnight” button. Click on the warning icon located to the right of the “Overnight” button to see what you are missing.
21. You will see the details you must provide to become 100 percent complete. Click the “Add Overnight” button to enter the missing information.
22. Click the “Location” dropdown to enter the location information for the missing date.
23. Click the “Note: (Optional)” field to enter additional details about finding you for testing at this location.
24. Click “ENTER MISING WHEREABOUTS ENTRIES” button to access the Filing Wizard.
25. Revisit the Filing Wizard welcome message if needed. Click “Continue” to advance.
26. Reference the completion percentage below the “Overnight” button. Click on the warning icon located to the right of the “Overnight” button to see what you are missing.
27. You will see the details you must provide to become 100 percent complete. Click the “Add Overnight” button to enter the missing information.
28. Click the “Location” dropdown to enter the location information for the missing date.
29. Click the “Note: (Optional)” field to enter additional details about finding you for testing at this location.
30. Click “Add to Calendar” once you have entered the appropriate details. Visit your calendar to confirm your entry.